Introduction
If you are developer working with API then you may using Insomnia or Postman for testing them.
In the real world, your project may have multiple environments, and it’s pain to duplicate the same request whenever switch to another environment. In this article, we’ll resolve this problem with Insomnia.
Setup Insomnia Environments
Note: I suppose our project only has two environments: local and production.
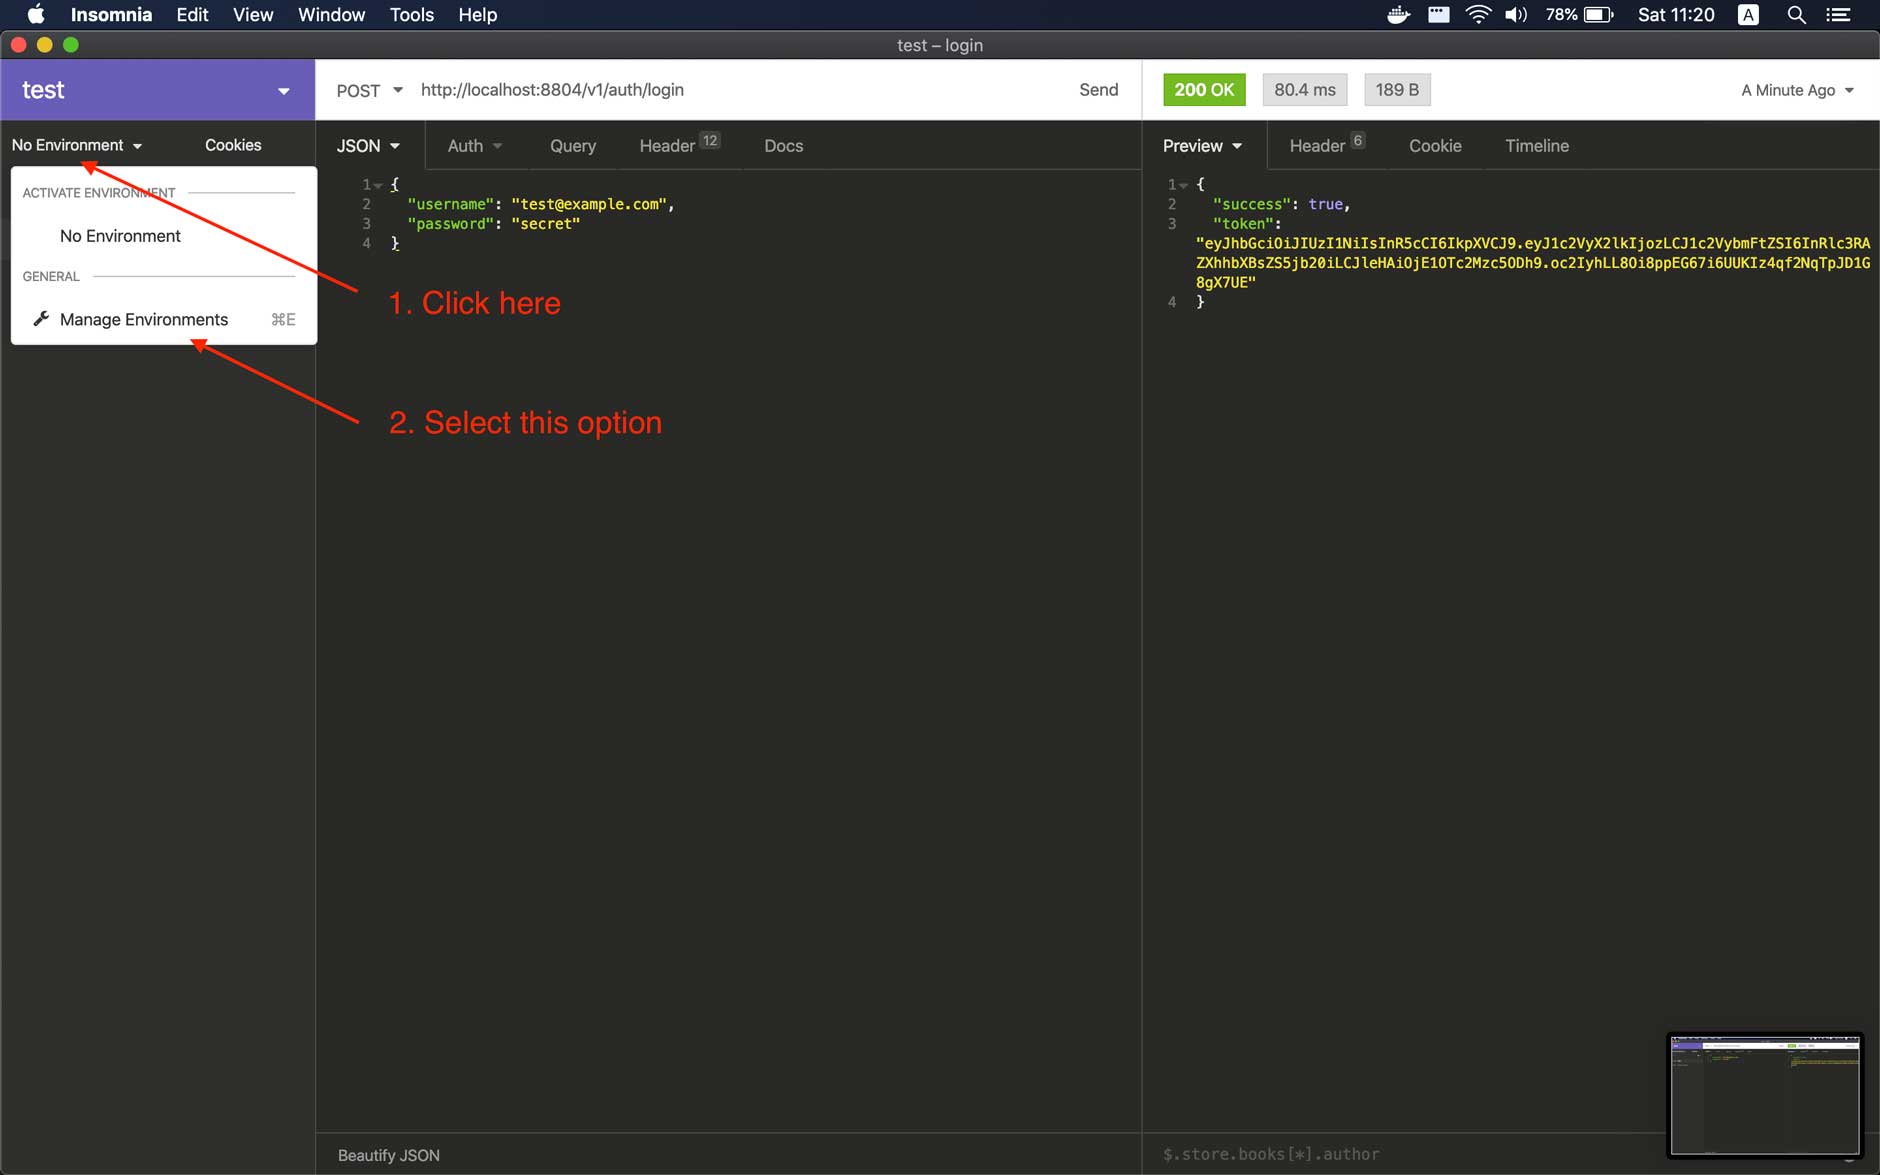
We need open Insomnia Manage Environments popup by pressing this keyboard shortcut: ⌘ + E or follow these steps:
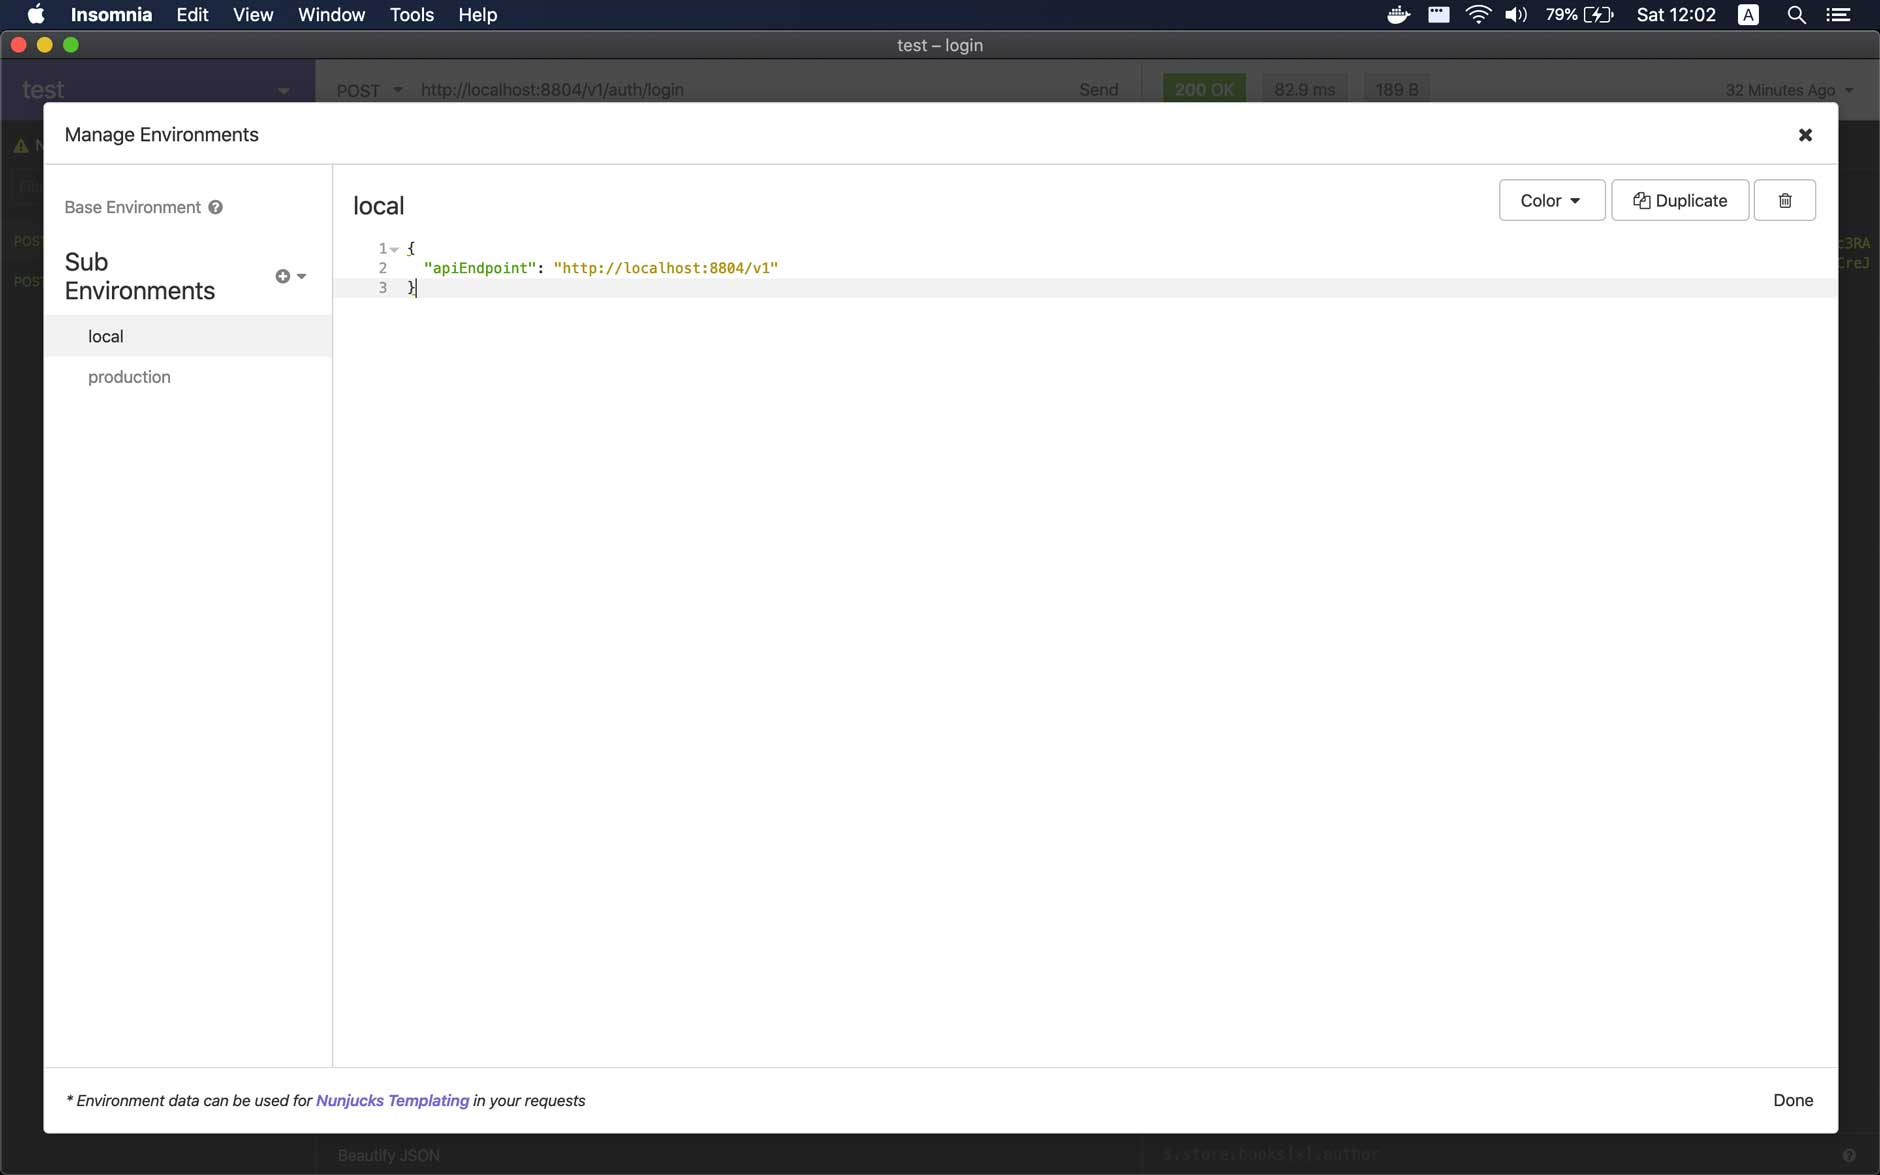
Next, create two sub environments (local and production) with the following contents in JSON format:
Local sub environment
{
  "apiEndpoint": "http://localhost:8804/v1" // change it to your local address
}
Production sub environment
{
  "apiEndpoint": "https://api.yourdomain.com/v1" // change it to your live address
}
We ended up with this result:
Testing our first API
I will import my login API into Insomnia by pasting this curl into it’s address bar:
curl --request POST \
  --url http://localhost:8804/v1/auth/login \
  --header 'content-type: application/json' \
  --data '{
    "username": "[email protected]",
    "password": "secret"
}'
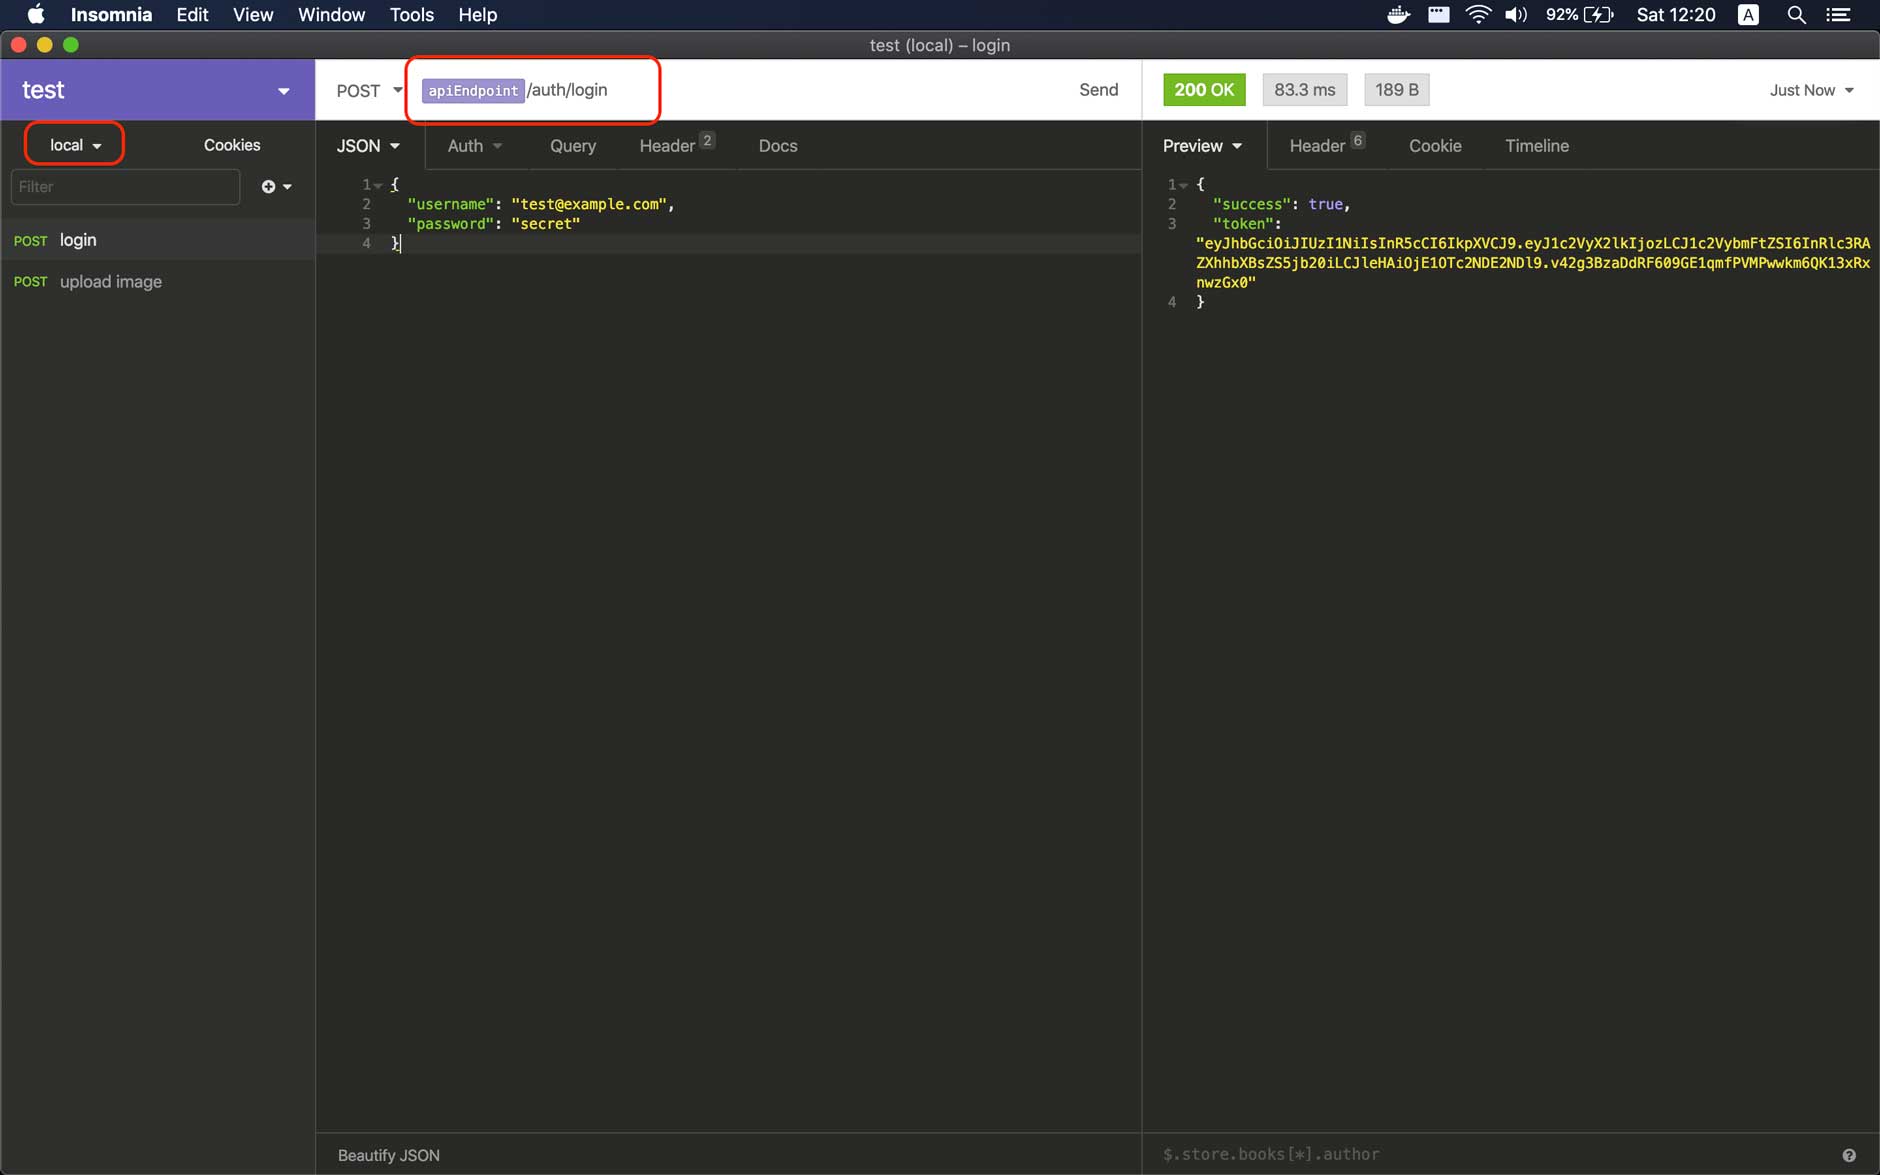
In the address bar, you might want to replace http://localhost:8804/v1 with the variable {{ apiEndpoint }} we’ve created before, set the active environment to local or production, and click Send button to see the result:
Test an authorize API
Now, we will test get profile API that requires a JWT token return from login API. Do we need manually submit login API and copy the token to the get profile API? Fortunately, the answer is “no”. Please follow these steps below to understand why:
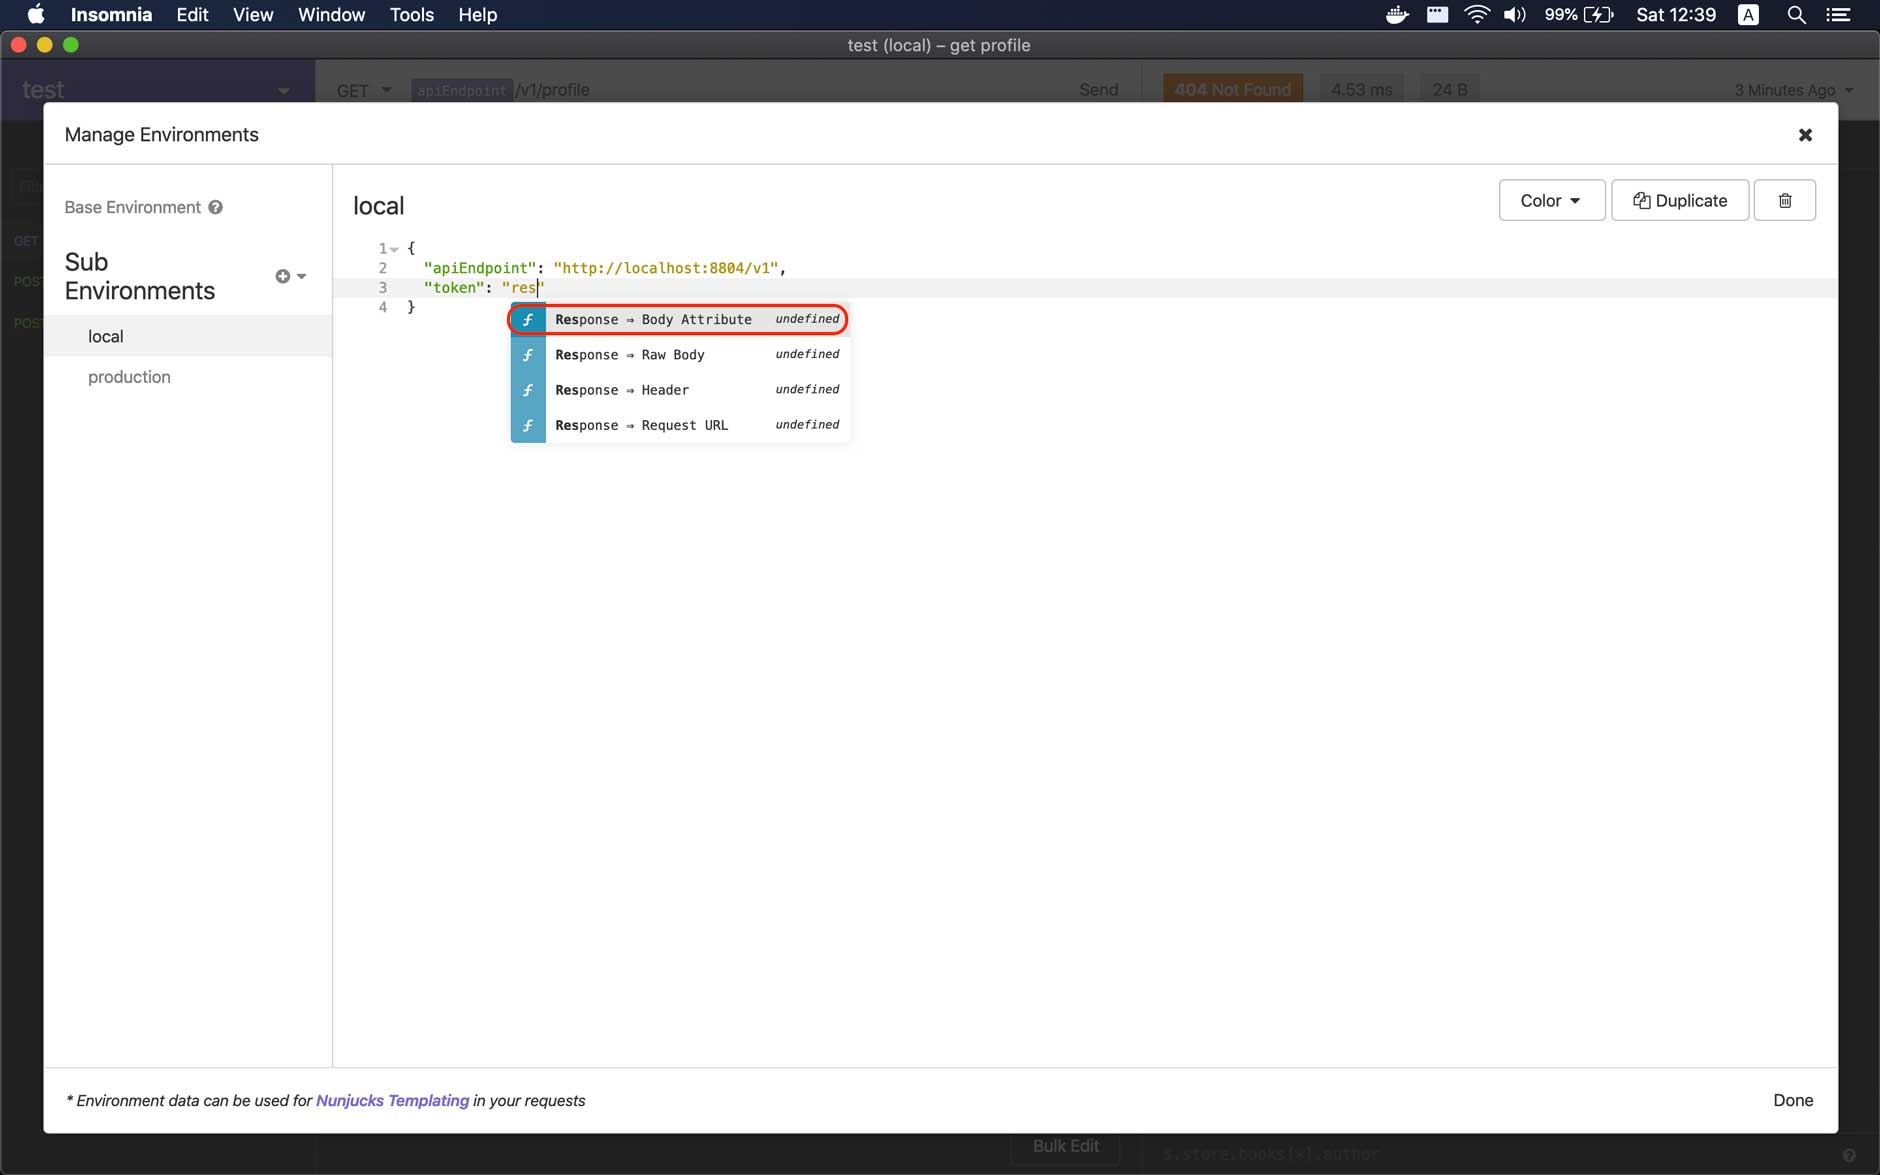
Step 1
Open Manage Environments popup, add token key with a special tag value from Insomnia (Response → Body Attribute tag) choose from a dropdown. You can invoke the dropdown be pressing CTRL+Space or by typing starting characters of the tag (respo…).
Step 2
Click on the tag added from the above step to update its configuration. First, on the Request field, select login API from the dropdown. On the Filter field, you can typing $ and check the very useful Live Preview content from bottom to see the result, we need the token result so I will put $.token here. Finally, click Done to save the configuration.
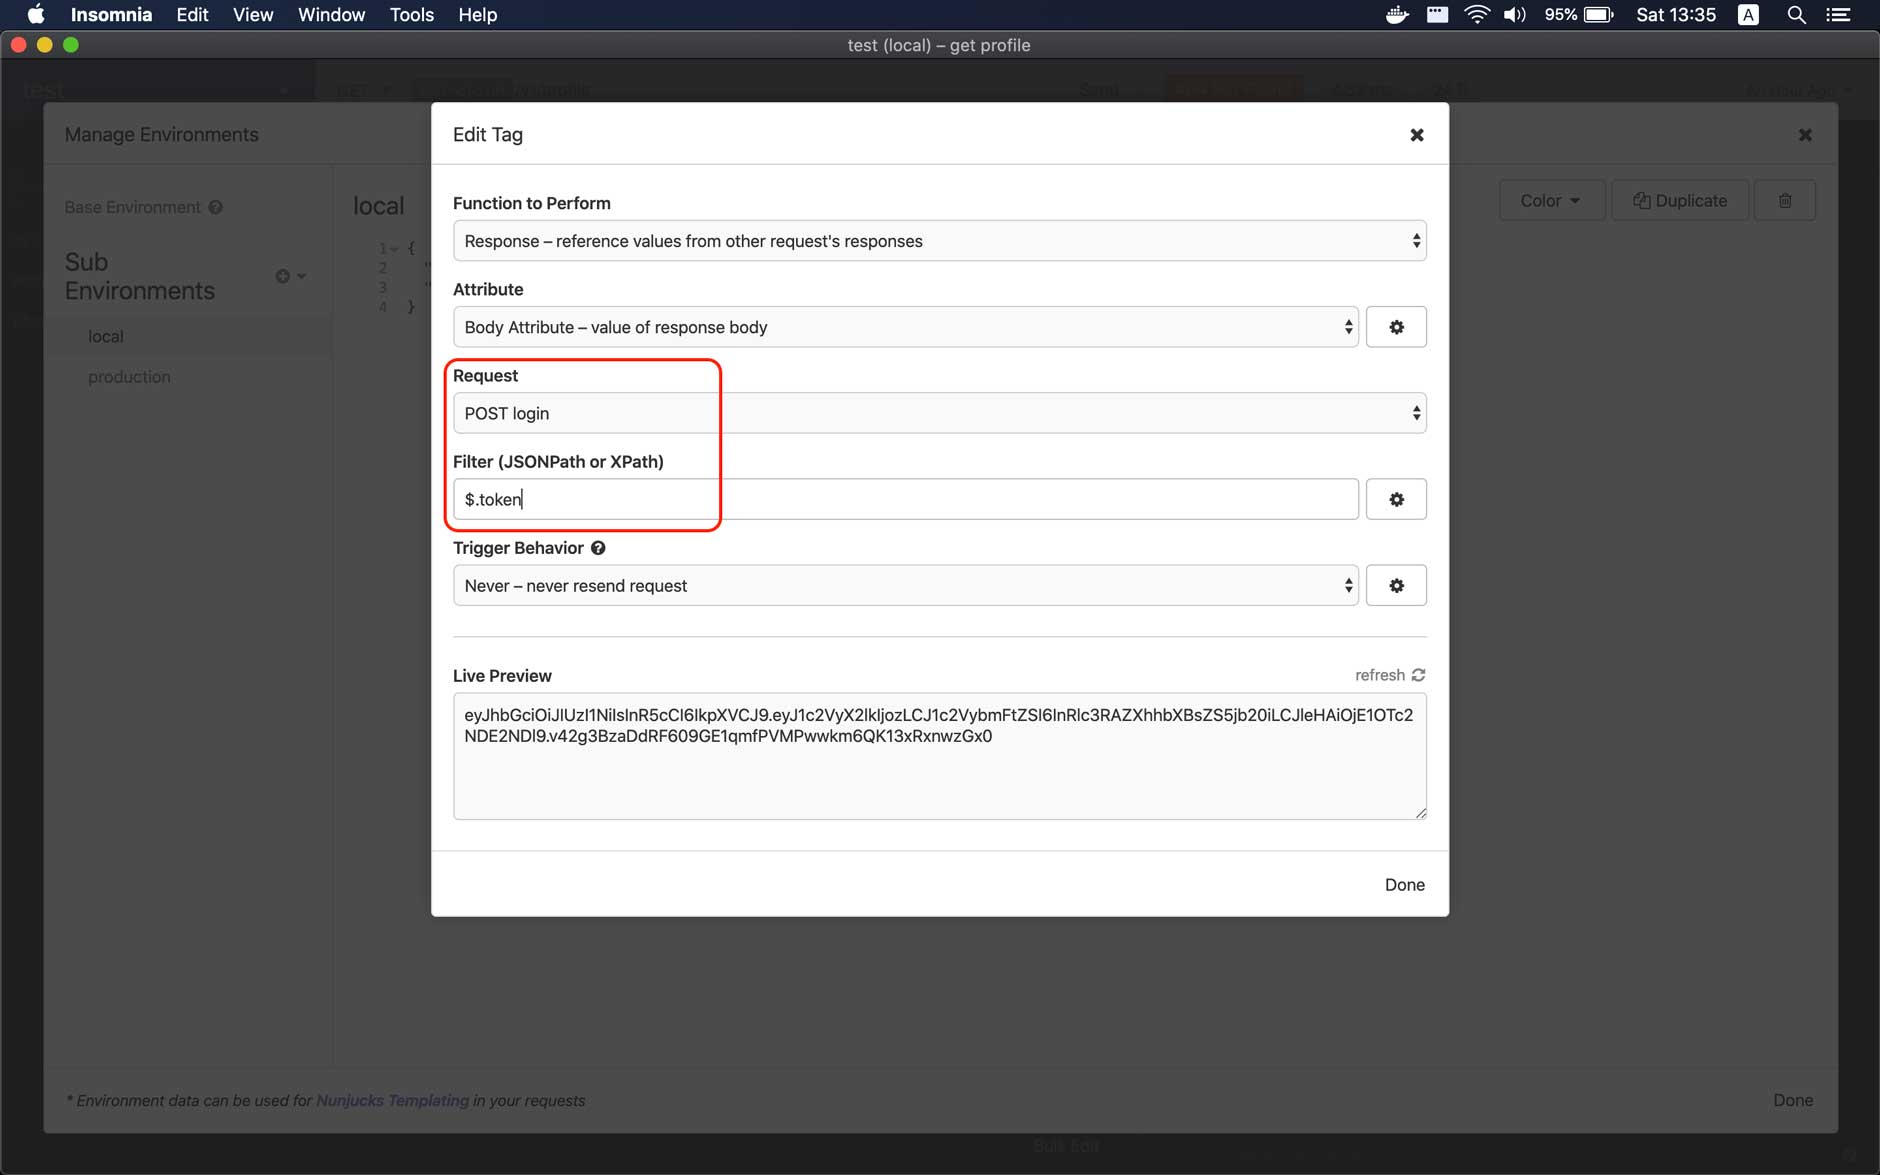
Step 3
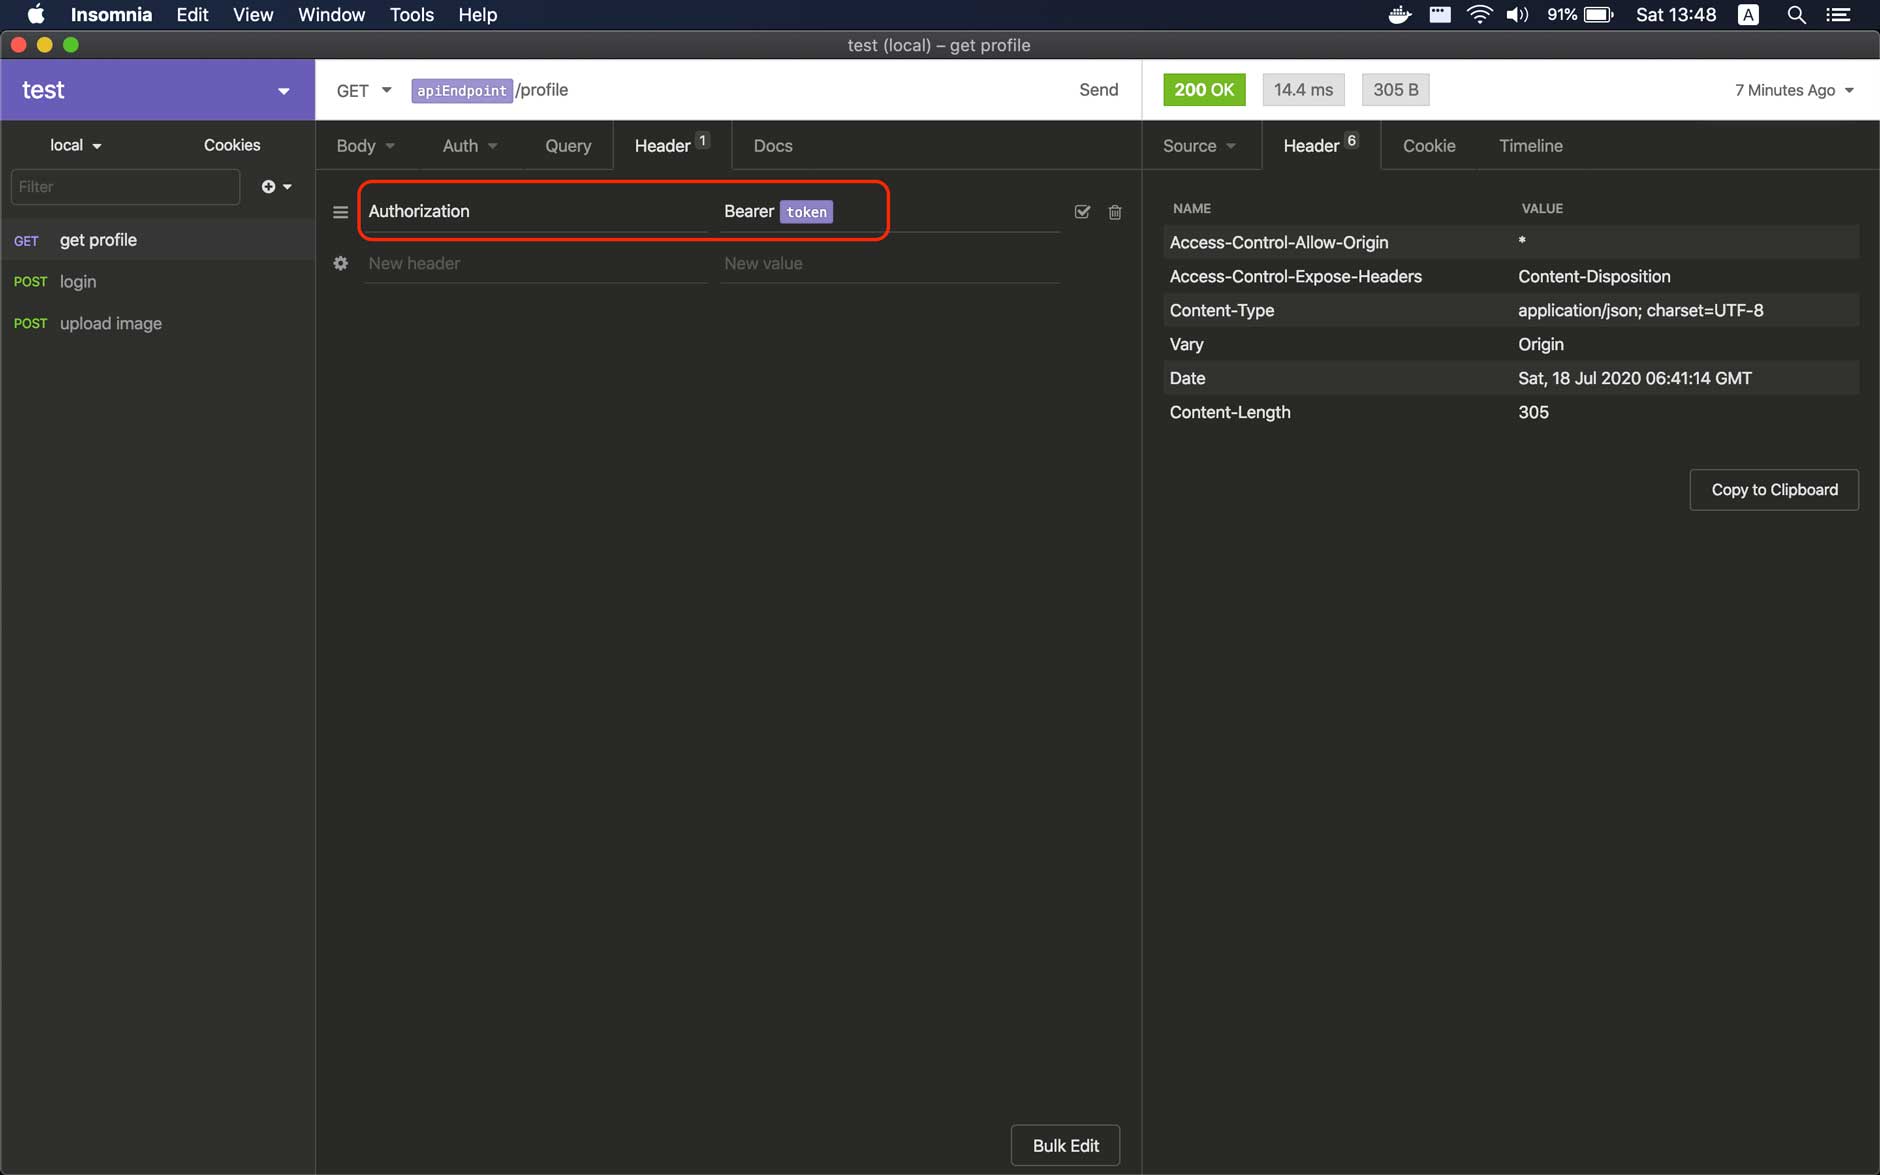
Update the Authorization header with this content Bearer {{ token }}
Note: Your authorization method may different but the key here is to demonstrate how to use Insomnia tag and variable.
Conclusion
Insomnia is a great application for testing HTTP requests with a clean and friendly UI. And I hope with this article, you can reduce pain when testing API.